How to build firmware
This page explains how to build the MCU firmware file (.UF2) from source code. The resulting file can be uploaded to the MCU of Flipper One via USB.
To build the MCU firmware locally:
Install Visual Studio Code, Python, and git.
Open a terminal in the folder where you want to store the firmware source code.
Clone the MCU firmware repository to your computer:
git clone --recursive https://github.com/flipperdevices/flipperone-mcu-firmware
Open Visual Studio Code and go to File → Open Folder... and select the flipperone-mcu-firmware folder you just cloned.
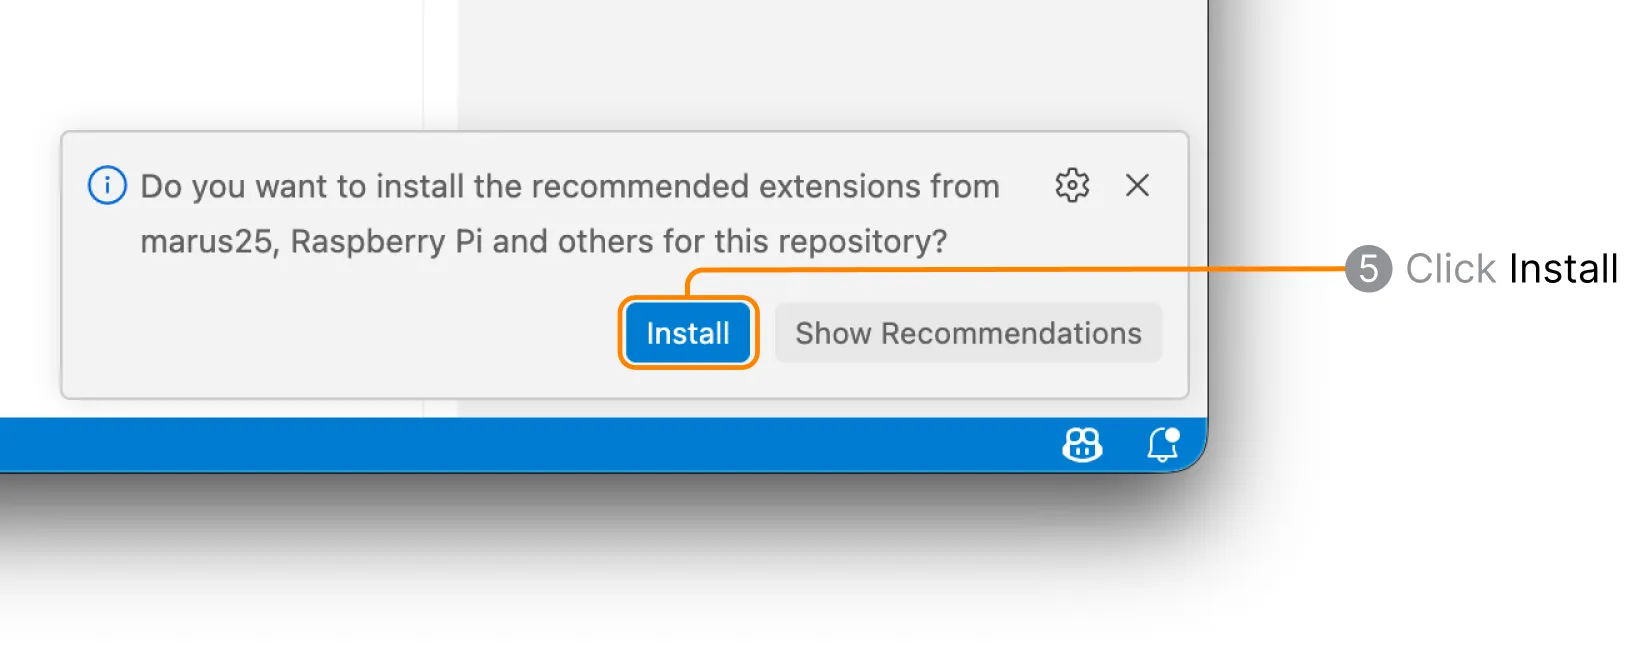
Visual Studio Code will prompt you to install the recommended extensions. Click Install to accept, and wait until the process is complete.
Click Raspberry Pi Pico Project in the left sidebar. If VS Code prompts you to import the project as a Raspberry Pi Pico project, click Yes and import it with the default settings.
Click Configure CMake.
Click Compile Project.
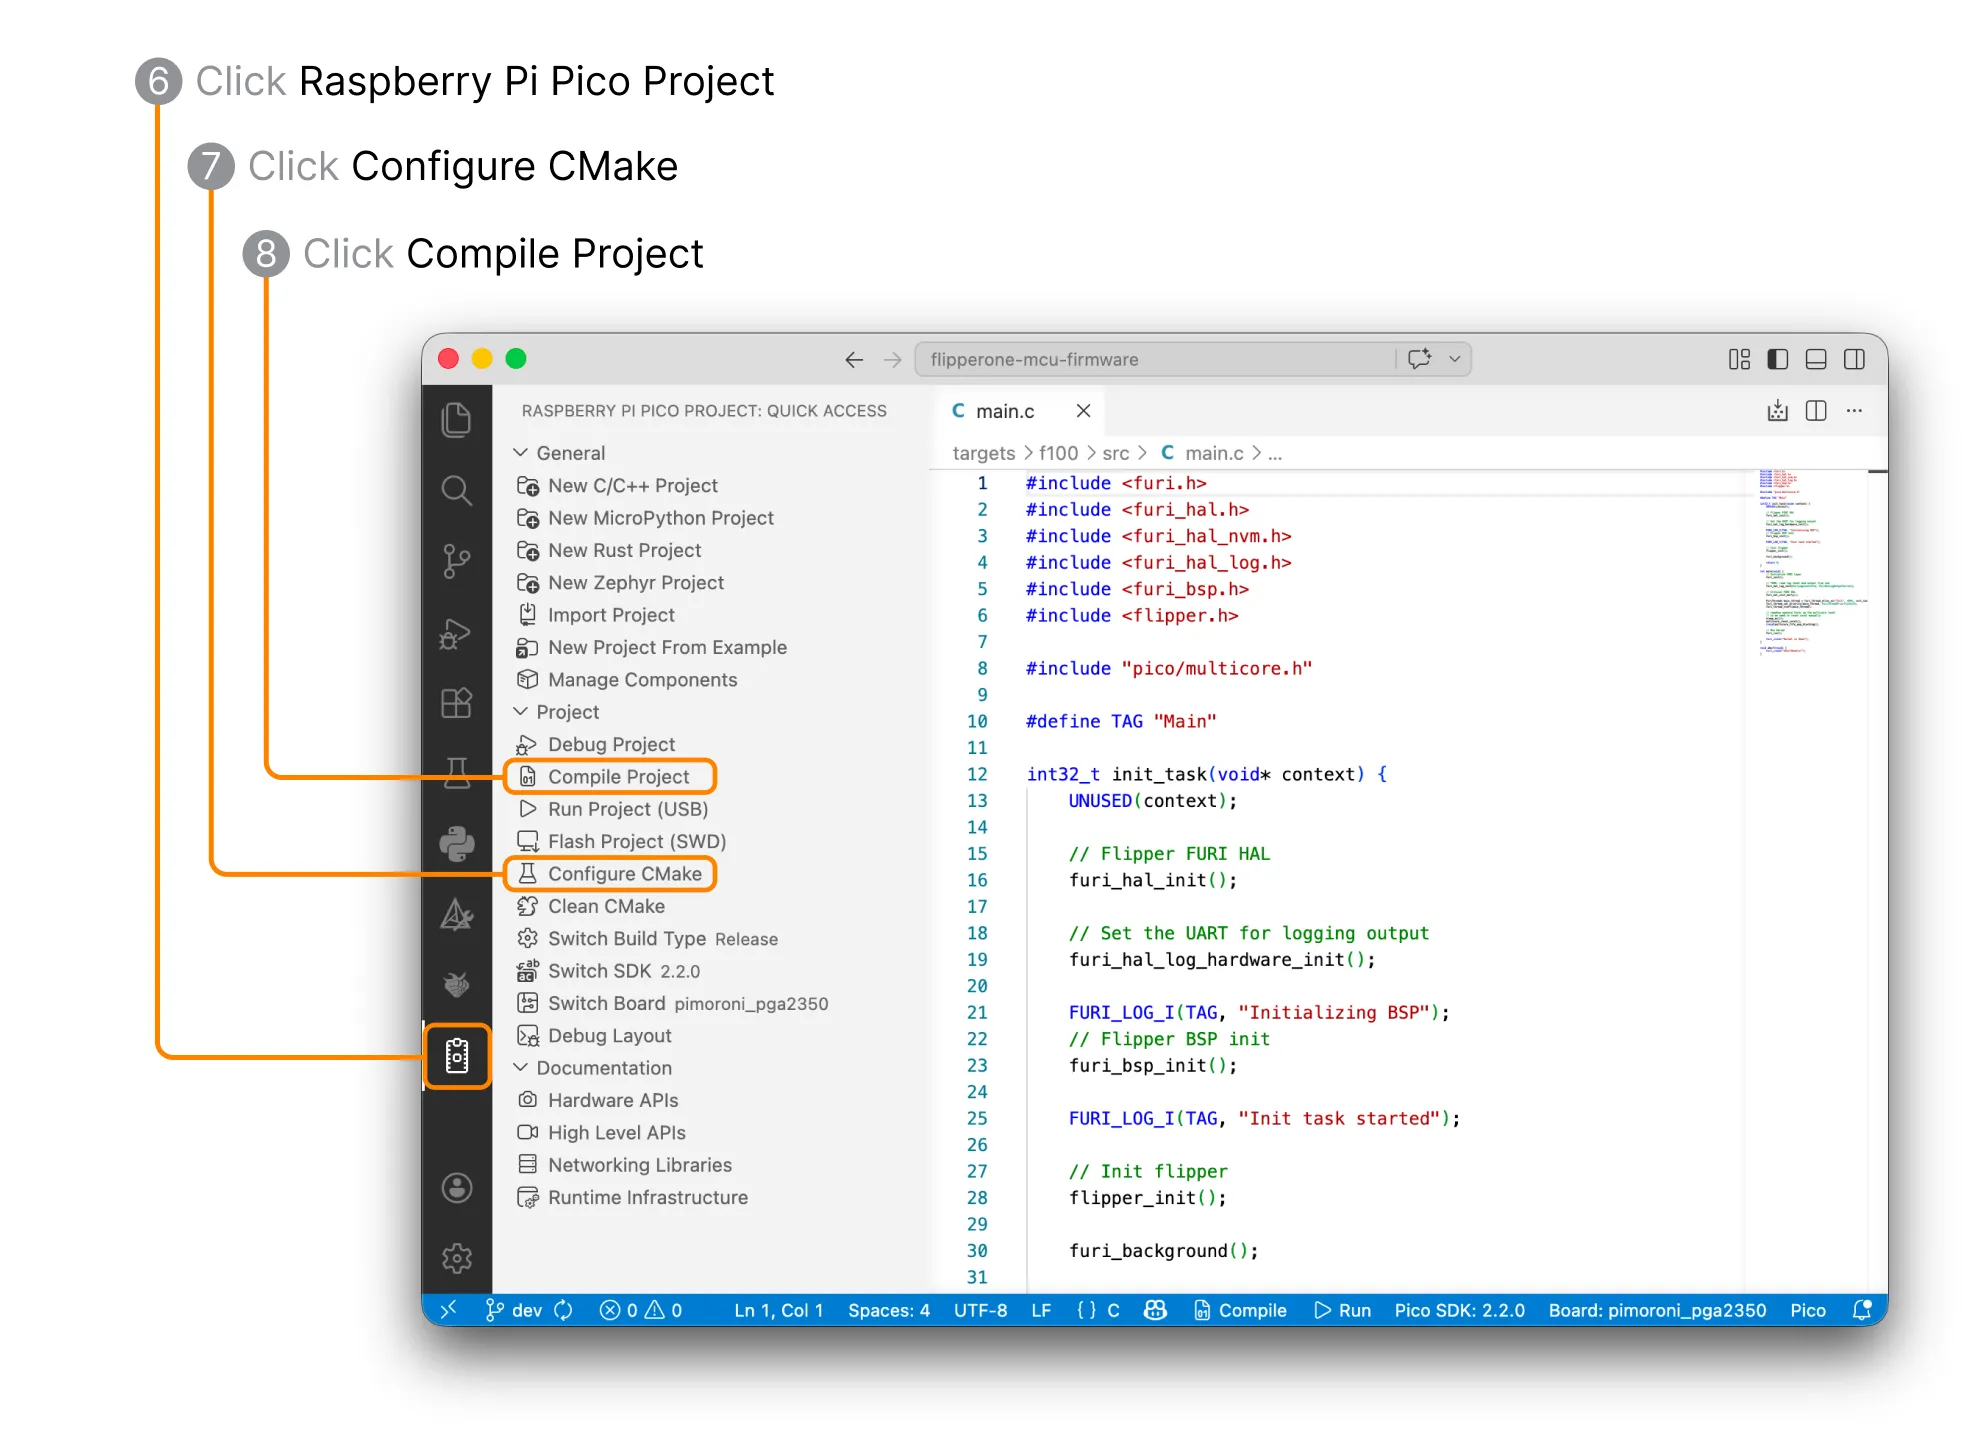
After a successful build, the firmware file is located in the flipperone-mcu-firmware/build folder.
By default, the firmware file is built for the Flipper One rev. F0B0C1 (target f1). If you need to build the firmware for rev. 2.F0B1C2 (target f2), go to Terminal → Run Task → Select Target and select the f2 target. After changing the target, click Compile Project again.
To flash the firmware to the MCU, follow the instructions on the Firmware Update page.