How to install a Linux image
Flipper OS can be installed on many Rockchip RK3576-based boards, including commercially available ones (see supported boards page).
There are two ways to install Flipper OS:
- Using Flipper OS Installer — a tool that runs on the device, downloads official Flipper OS images and profiles, and installs them to microSD card or UFS storage.
- By writing an OS image to a microSD card using a card reader.
RK3576 boots from storage devices according to the boot priority For example, Flipper One uses the following boot order: UFS → SD card → USB. If you need RK3576 to skip booting from UFS, see How to erase the bootloader on UFS.
Install OS using Flipper OS Installer
You'll need:
- Flipper One or another supported board.
- A Linux (Debian) or macOS PC to load the OS Installer onto the board.
- A USB-C cable to connect the device to your PC.
- An Ethernet cable with internet access.
For boards other than Flipper One, you'll also need:
- An HDMI monitor.
- A USB keyboard.
The OS installation process consists of three steps:
Step 1. Install rockusb on your PC
The rockusb tool is required to load the Flipper OS Installer image into the RK3576's RAM using MaskROM mode of the SoC.
To install rockusb on your PC, follow the instructions for your operating system:
Run the command: sudo apt update && sudo apt install rockusb
Run rockusb to verify that it works: rockusb
Step 2. Run Flipper OS Installer on your board
Go to the installer build artifacts page and select the latest installer build (the first item in the list).
Click your board's target name and download installer-falcon-loader.bin. If you don't know the target name, check Supported Boards.
Connect the cables:
- Flipper One: Disconnect the HDMI monitor, if connected.
- Other boards: Connect an HDMI monitor and USB keyboard.
- Connect the board to your PC via its MaskROM USB port. If unsure which port to use, check Supported Boards.
- Connect the board to a LAN with internet access.
Put the board into MaskROM mode as described in Supported Boards.
On your PC list connected devices in MaskROM mode: rockusb list
If no devices are listed, check the USB connection and port, re-enter MaskROM mode, and run the command again.
To upload and run the Flipper OS Installer on your device, run the command on your PC from the folder containing the Installer image: rockusb download-boot installer-falcon-loader.bin
Flipper OS Installer UI will appear:
- Flipper One: On the device screen. Use the buttons to navigate.
- Other boards: On the HDMI monitor. Use a USB keyboard to navigate. The keys work as follows:
Key on Flipper One | Key on USB keyboard |
|---|---|
D-pad Ok button | ↵ Enter |
D-pad arrow buttons | ← ↑ → ↓ Arrow buttons |
Back button | ⌫ Backspace |
Esc button | Z |
View button | X |
Power button | C |
Edit button | V |
Run button | B |
Step 3. Install the OS
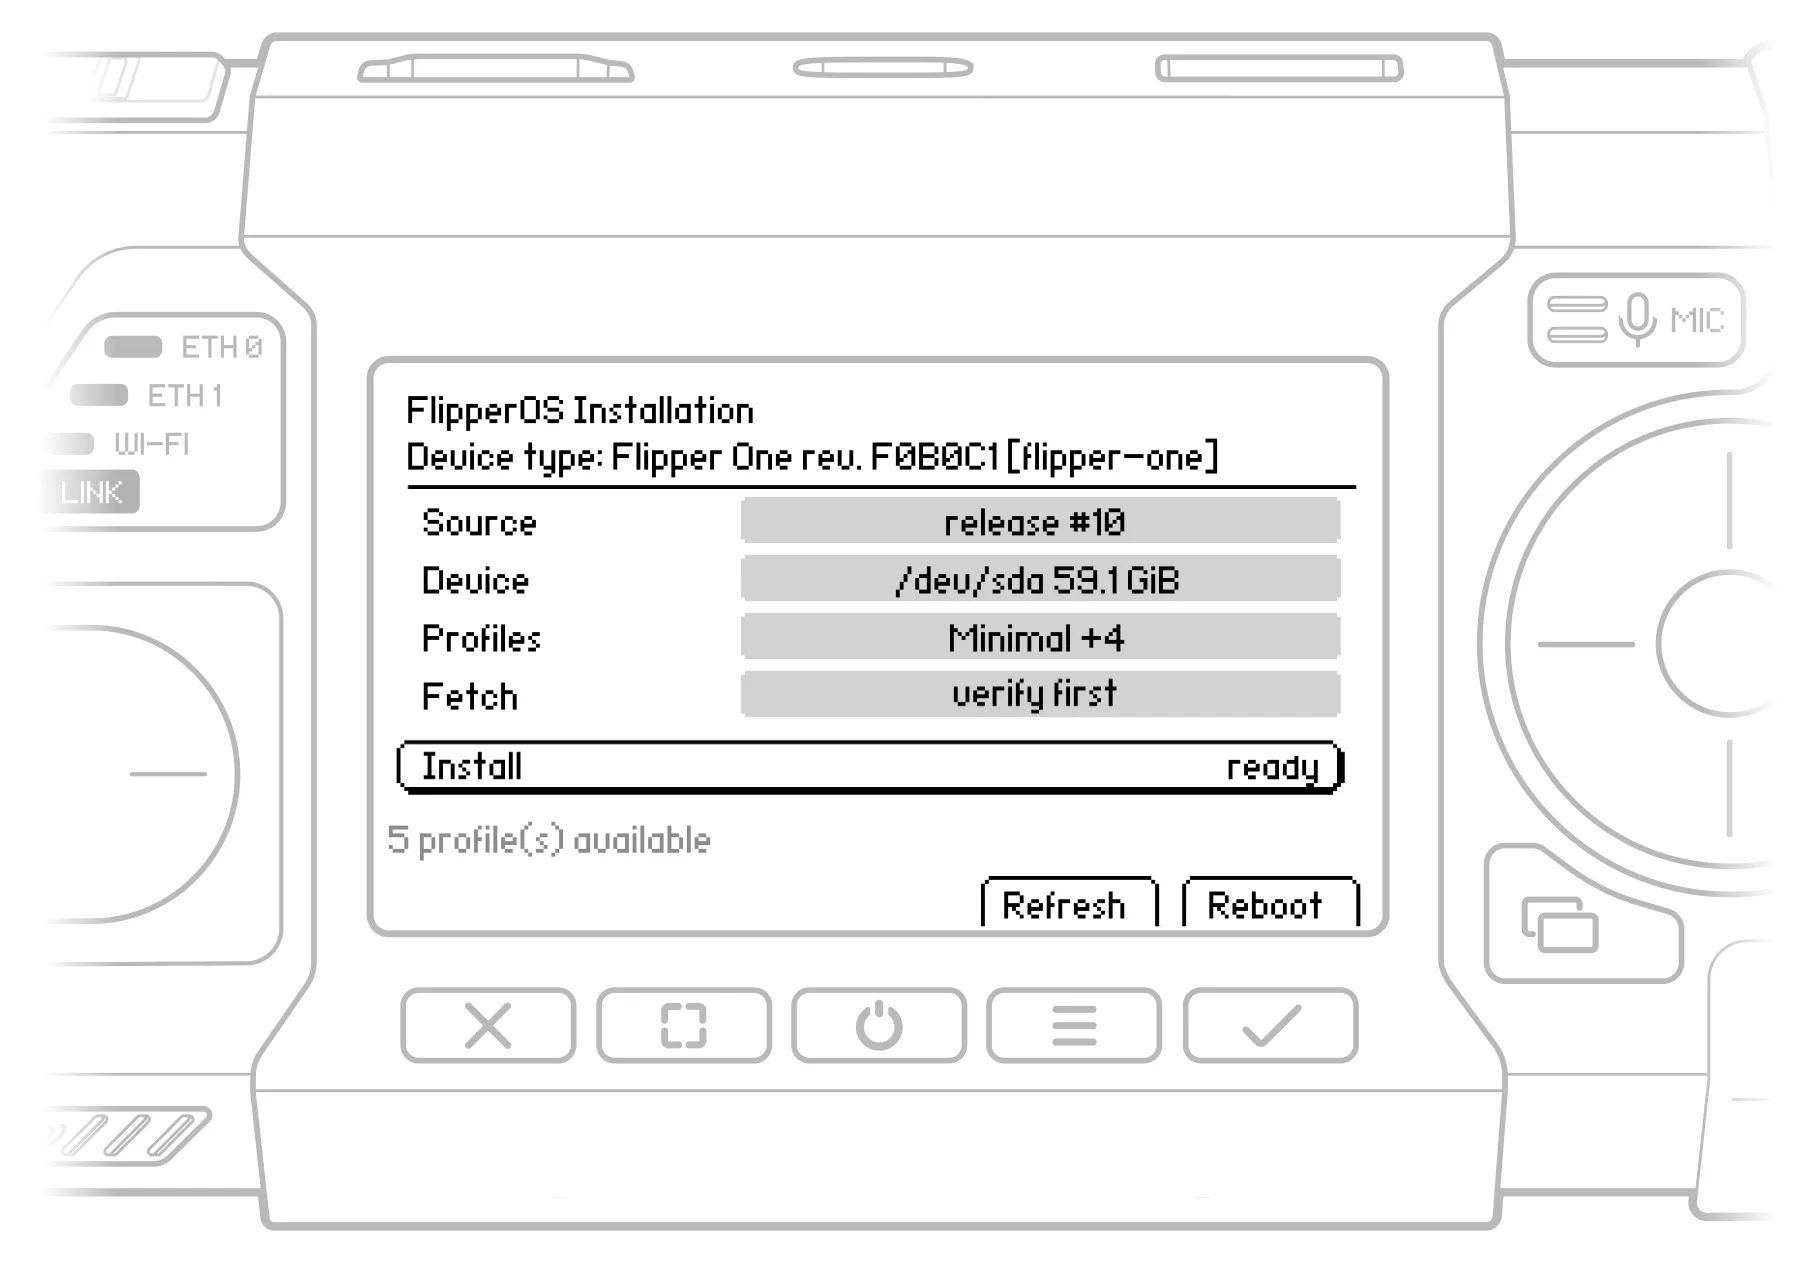
In the Flipper OS Installer, do the following:
In Source, select the OS release branch:
- Release — Stable and tested builds.
- Release candidate — Builds ready for final testing before release.
- Nightly — Latest daily builds.
- Dev — Builds in active development.
After selecting a branch, choose an OS build from the list.
In Device, select the storage device to install the OS on:
- /dev/mmcblk0 [eMMC] — microSD card.
- /dev/sda [UFS] — UFS storage.
If UFS is present but lacks the required hardware partitions (logical units) for the Flipper OS installation, you will need to select Reprovision UFS first. Reprovisioning will erase all data on the UFS storage!
In Profiles, select the official OS profiles to install. The Minimal profile is always installed. Other profiles are optional.
See OS profiles and snapshots for more information about OS profiles.
In Fetch, select how the installer downloads and verifies the OS image:
- Download & verify (more reliable, but slower) — Downloads the entire image, verifies its integrity, and writes it to storage.
- Stream (faster, but less reliable) — Writes the image while downloading. Each block is verified before being written, but a verification failure only generates warnings in the installation log.
Press Install and wait for the installation to complete. Then press Reboot.
Write an OS image to a microSD card
The microSD card will be erased during this process!
To write the OS image on a microSD card:
Download or build an OS image. Use debian-512-[Target name]-build-[Build ID].img.zst, where [Target name] identifies your board. See Supported Boards for available target names.
Connect an 8 GB or larger microSD card to your PC using a card reader.
Download and run Raspberry Pi Imager on your PC.
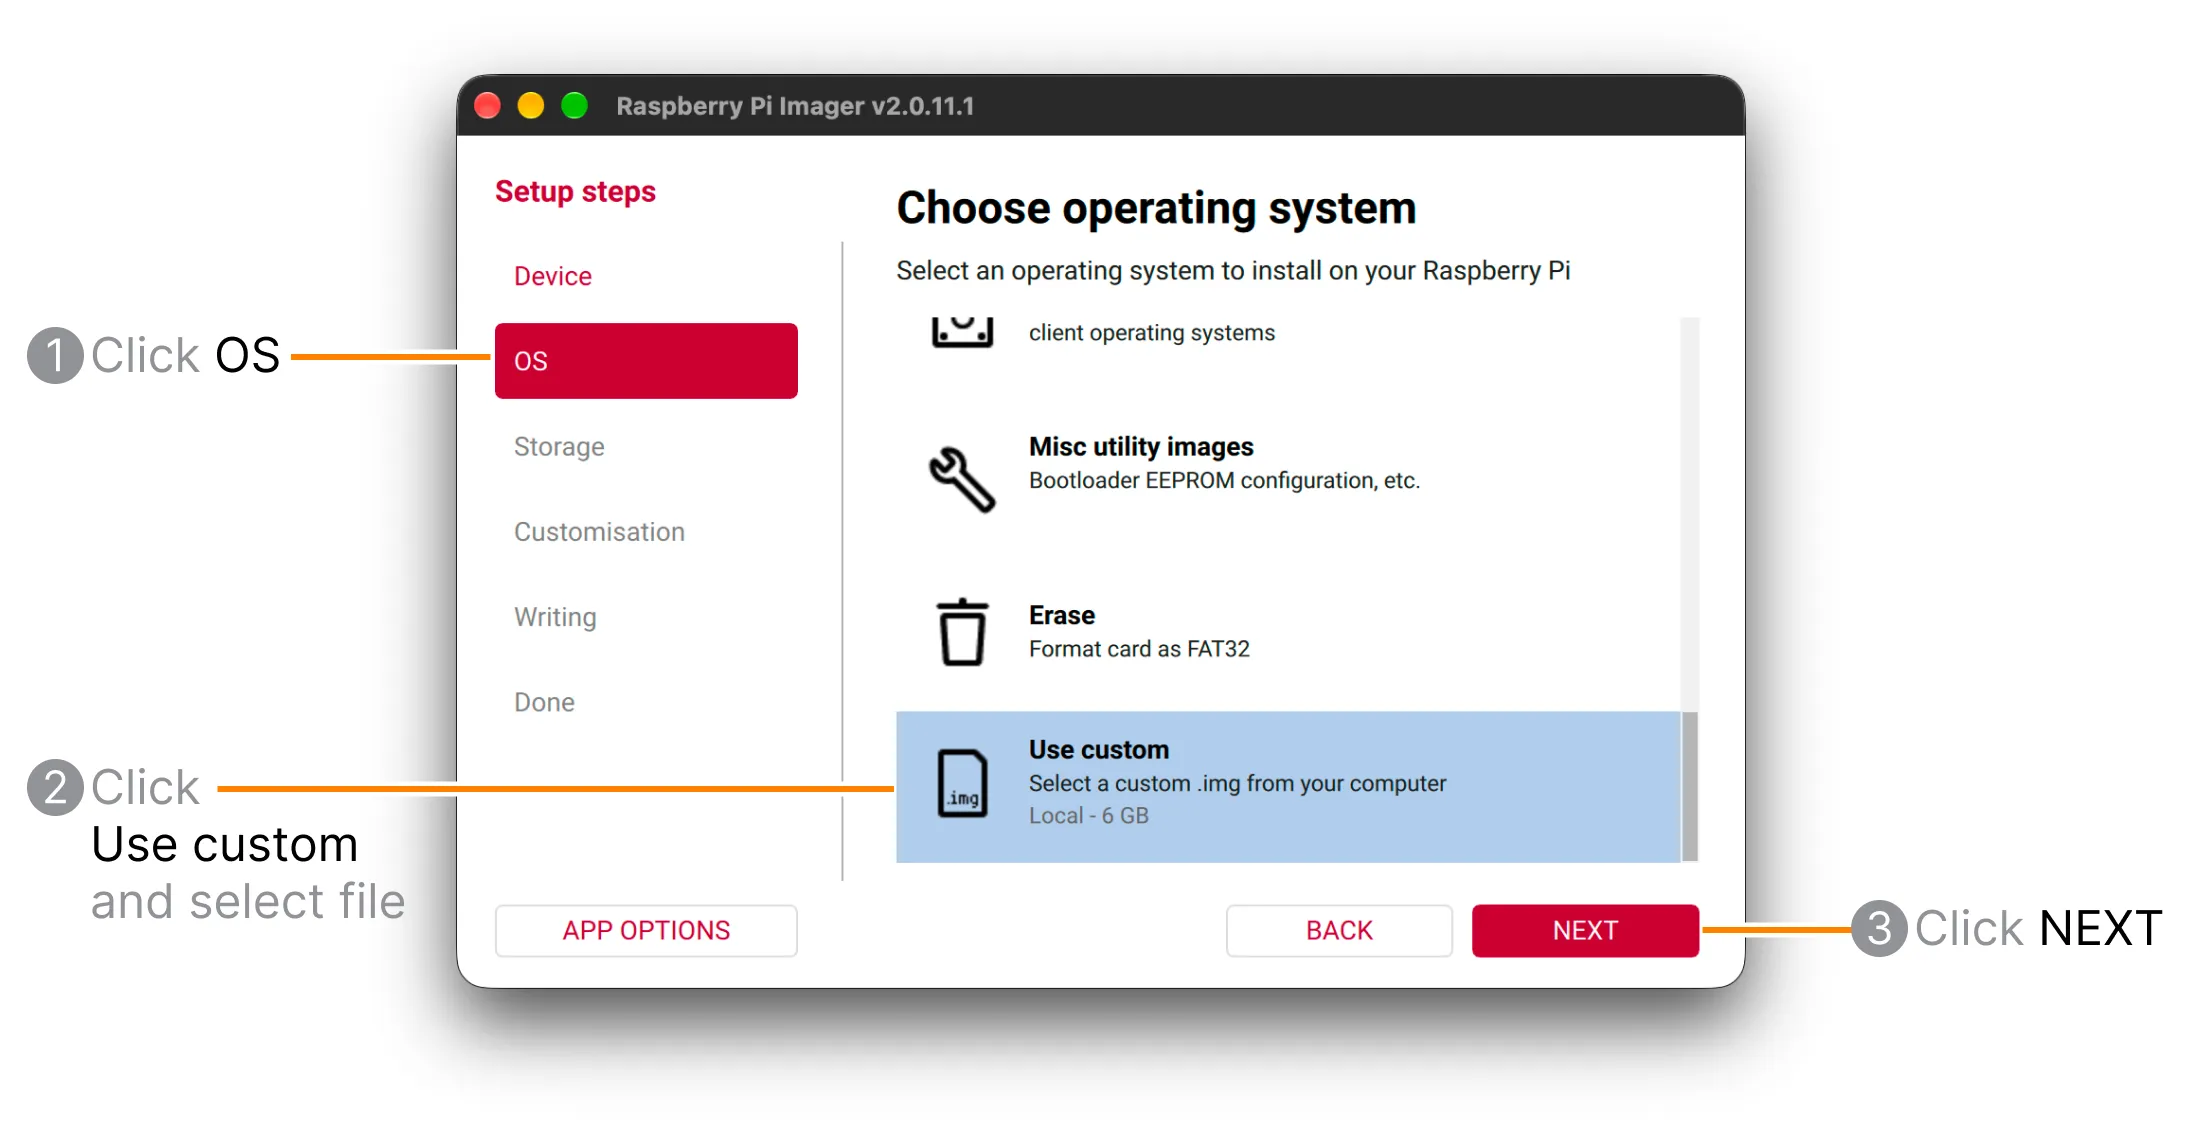
Click the OS tab. Then click Use custom, select the .zst OS image and click NEXT.
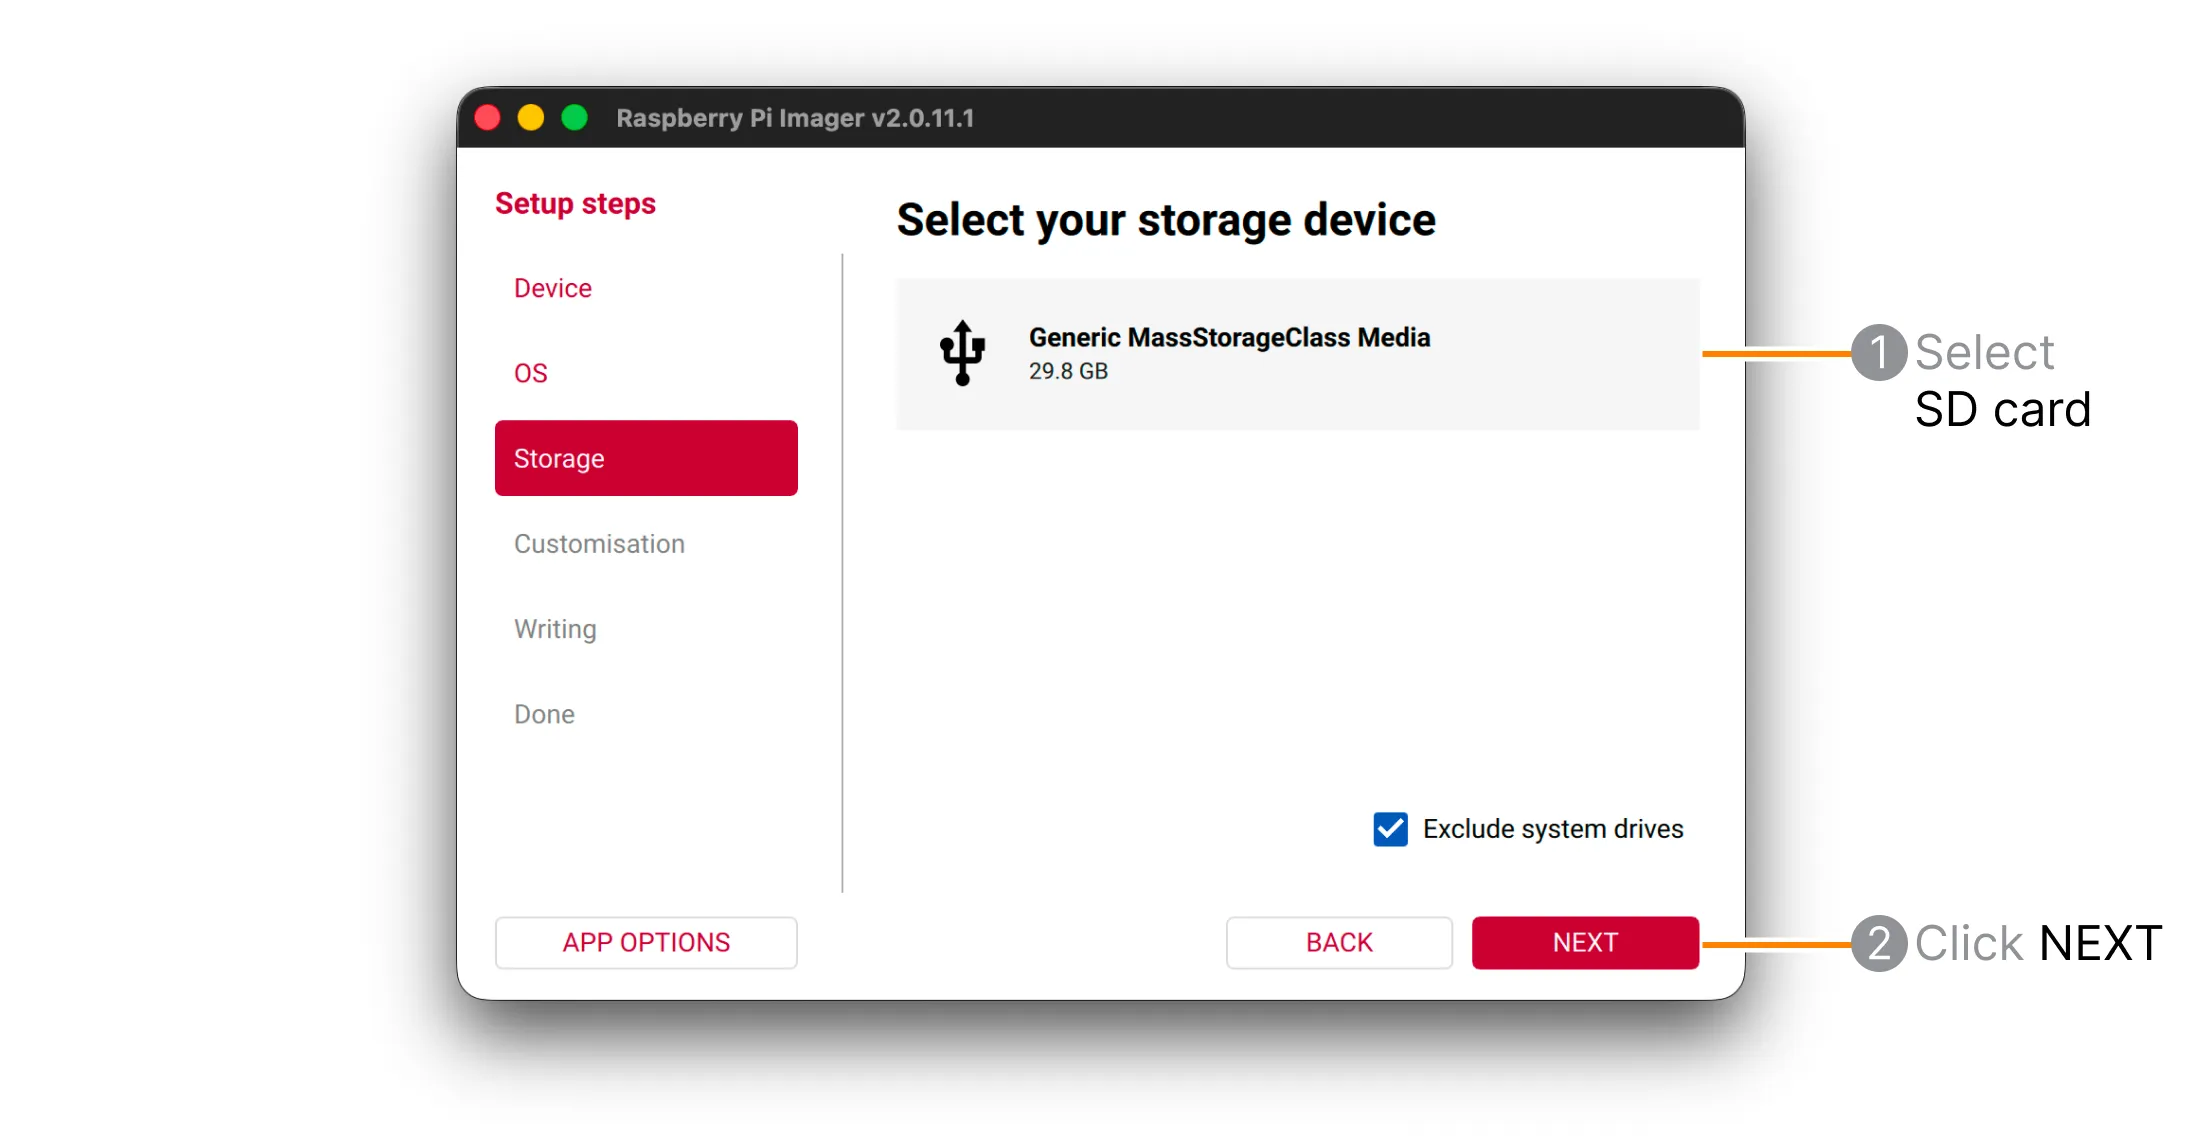
In the Storage tab, select your microSD card in the list and click NEXT.
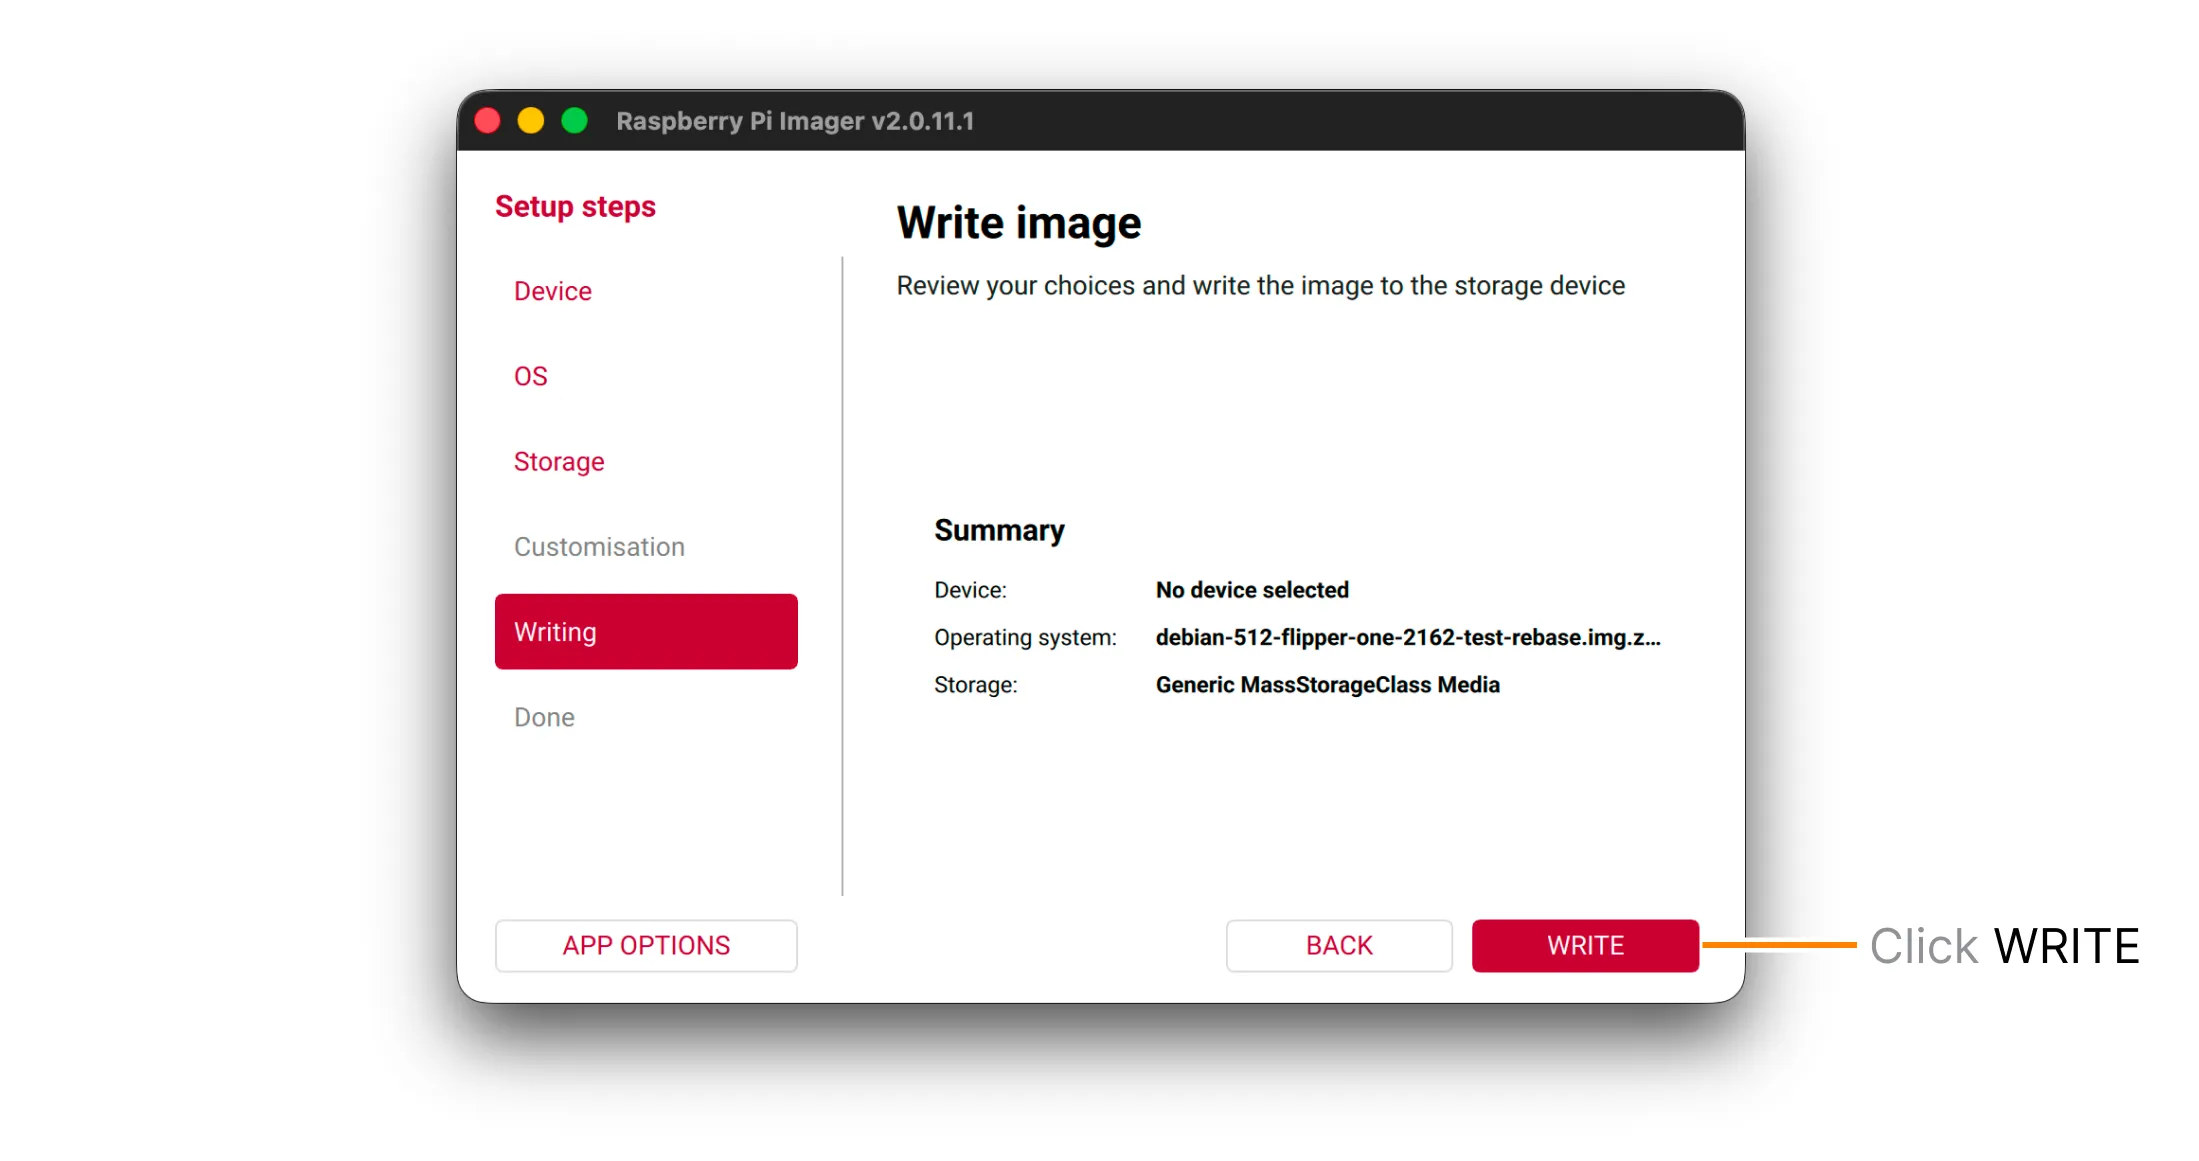
On the Writing tab, click WRITE and wait until the process finishes.
Insert the microSD card into your board and reboot the board.
Mind the boot priority
The RK3576 boots from storage devices according to their boot priority. For example, Flipper One uses the following boot order: UFS → SD card → USB.
If UFS contains a bootable OS, the device will boot from UFS instead of the microSD card. To make the UFS storage unbootable, see How to erase the bootloader on UFS.
How to erase the bootloader on UFS
This will erase the bootloader from UFS, making it unbootable until it is reflashed. User data will not be affected.
To erase the bootloader on UFS storage, do the following:
First, boot your device from UFS storage.
Run in the terminal:
sudo blkdiscard /dev/sdb sudo blkdiscard /dev/sdc
Reboot the device.